iOS Mail
This guide is a complete walkthrough for setting up the built-in iOS Mail app to retrieve email from an account hosted on one of our shared servers. Please note that apps change over time, so the details may not exactly match these. The overall process should be similar though.
The quickest way to set up your email account is to use our QR code feature:
If you use an iPhone or iPad, you can load the settings for your mailbox by scanning a QR code for your mailbox, available in our Control Panel. To access the QR code, use the Details link for mailbox in the Email Addresses page for your domain.
You will need to have configured a mailbox and password. If you have an existing mailbox, but can't remember the password, you can always reset the password through the customer control panel
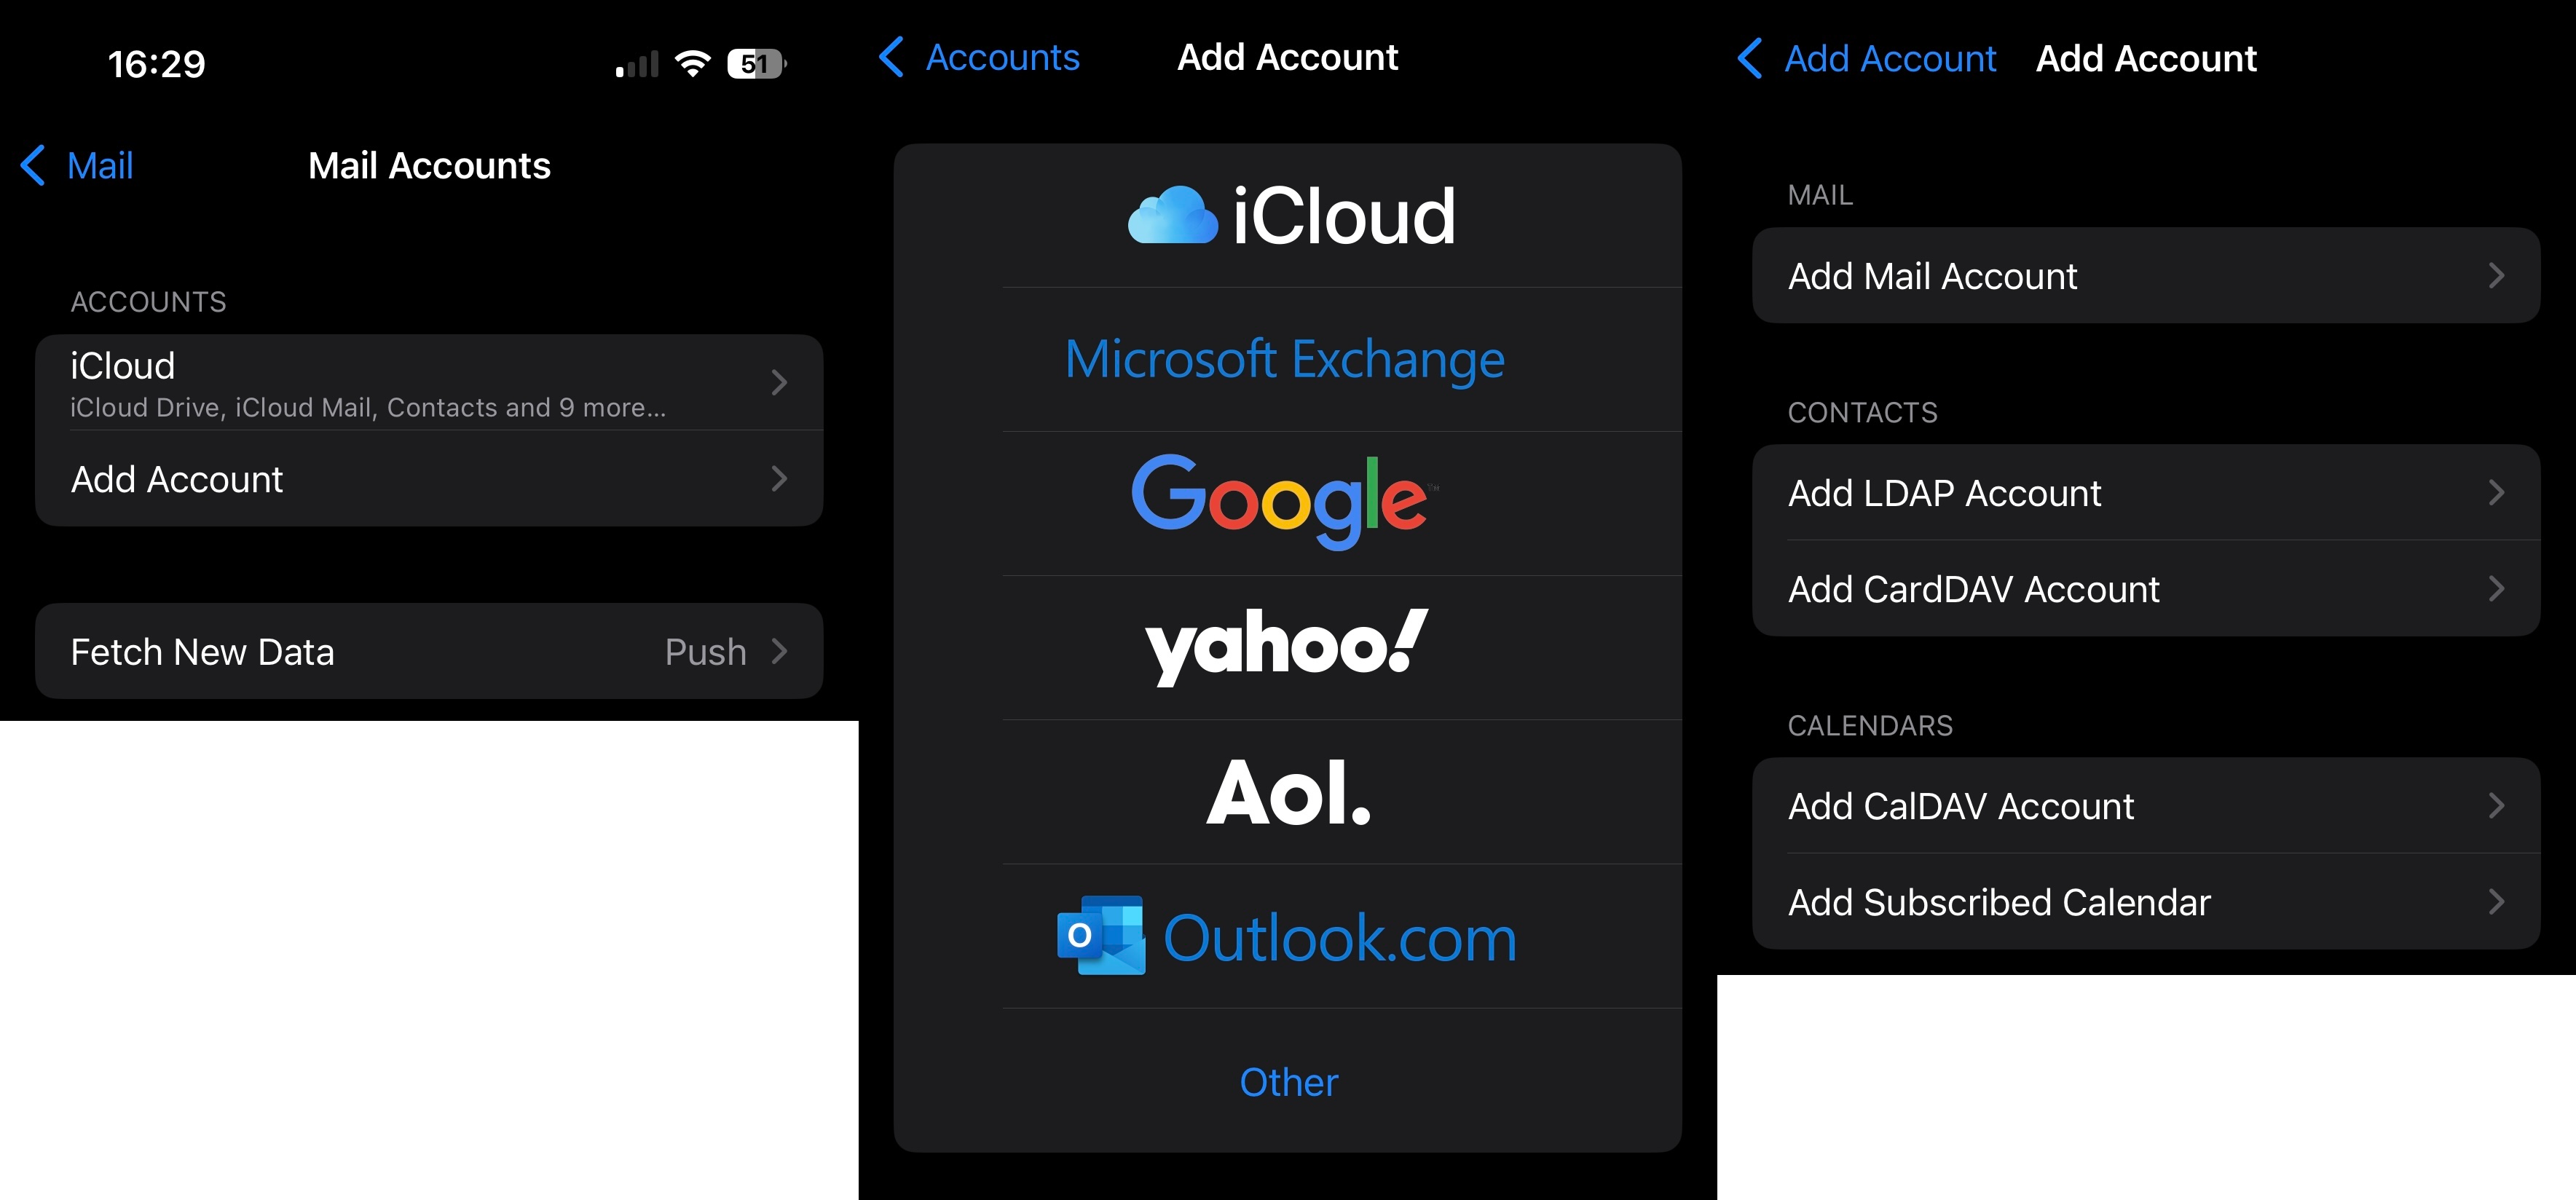 First, go to the settings app, and find the entry for the mail app. You can either search for it or find it in the app list. Then, select "Mail Accounts", and tap "Add Account". You will then be presented with a list of email providers, select "Other". On the next screen, select "Add Mail Account".
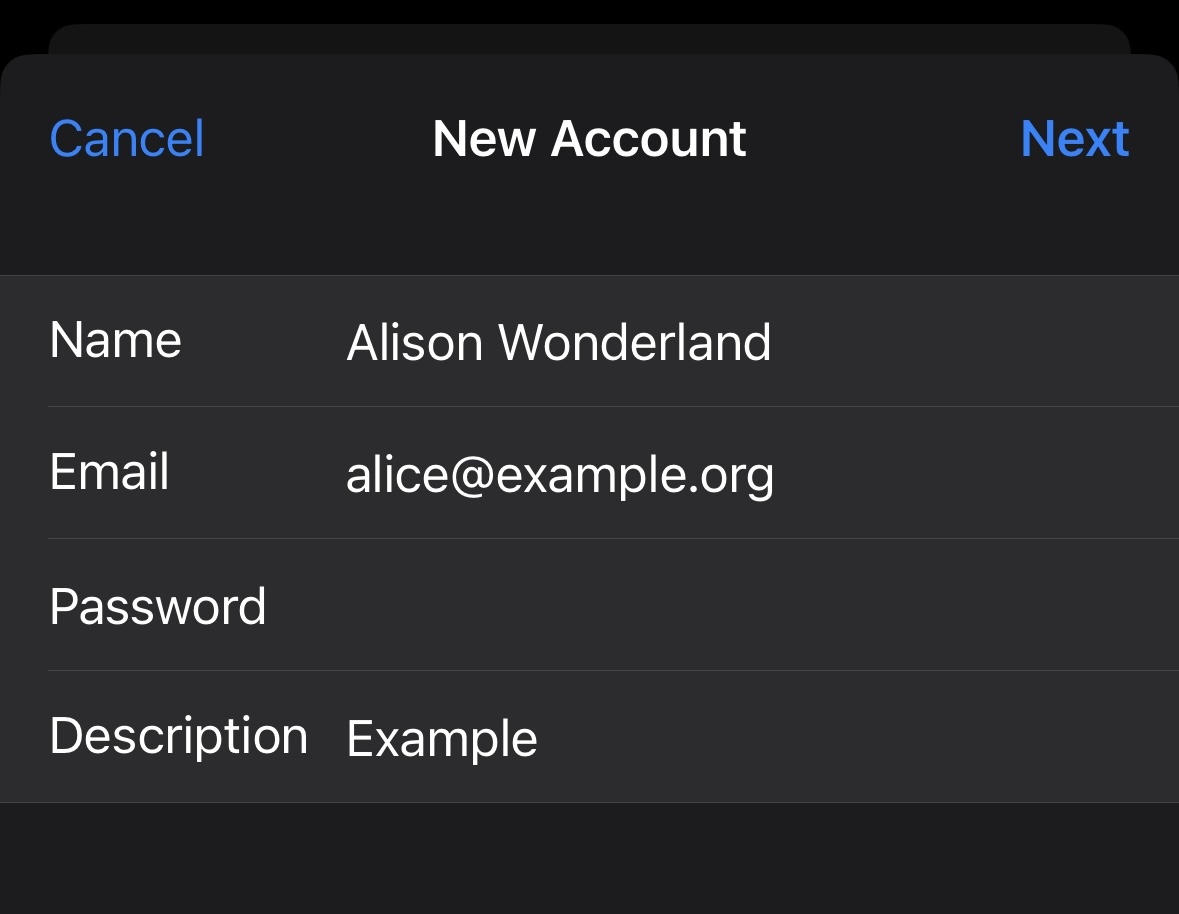 On this screen enter in the name you want other people to see when you send email to them, the email address you want to use, the password, and optionally a description that describes what the account is. Tap next once you've entered the information.
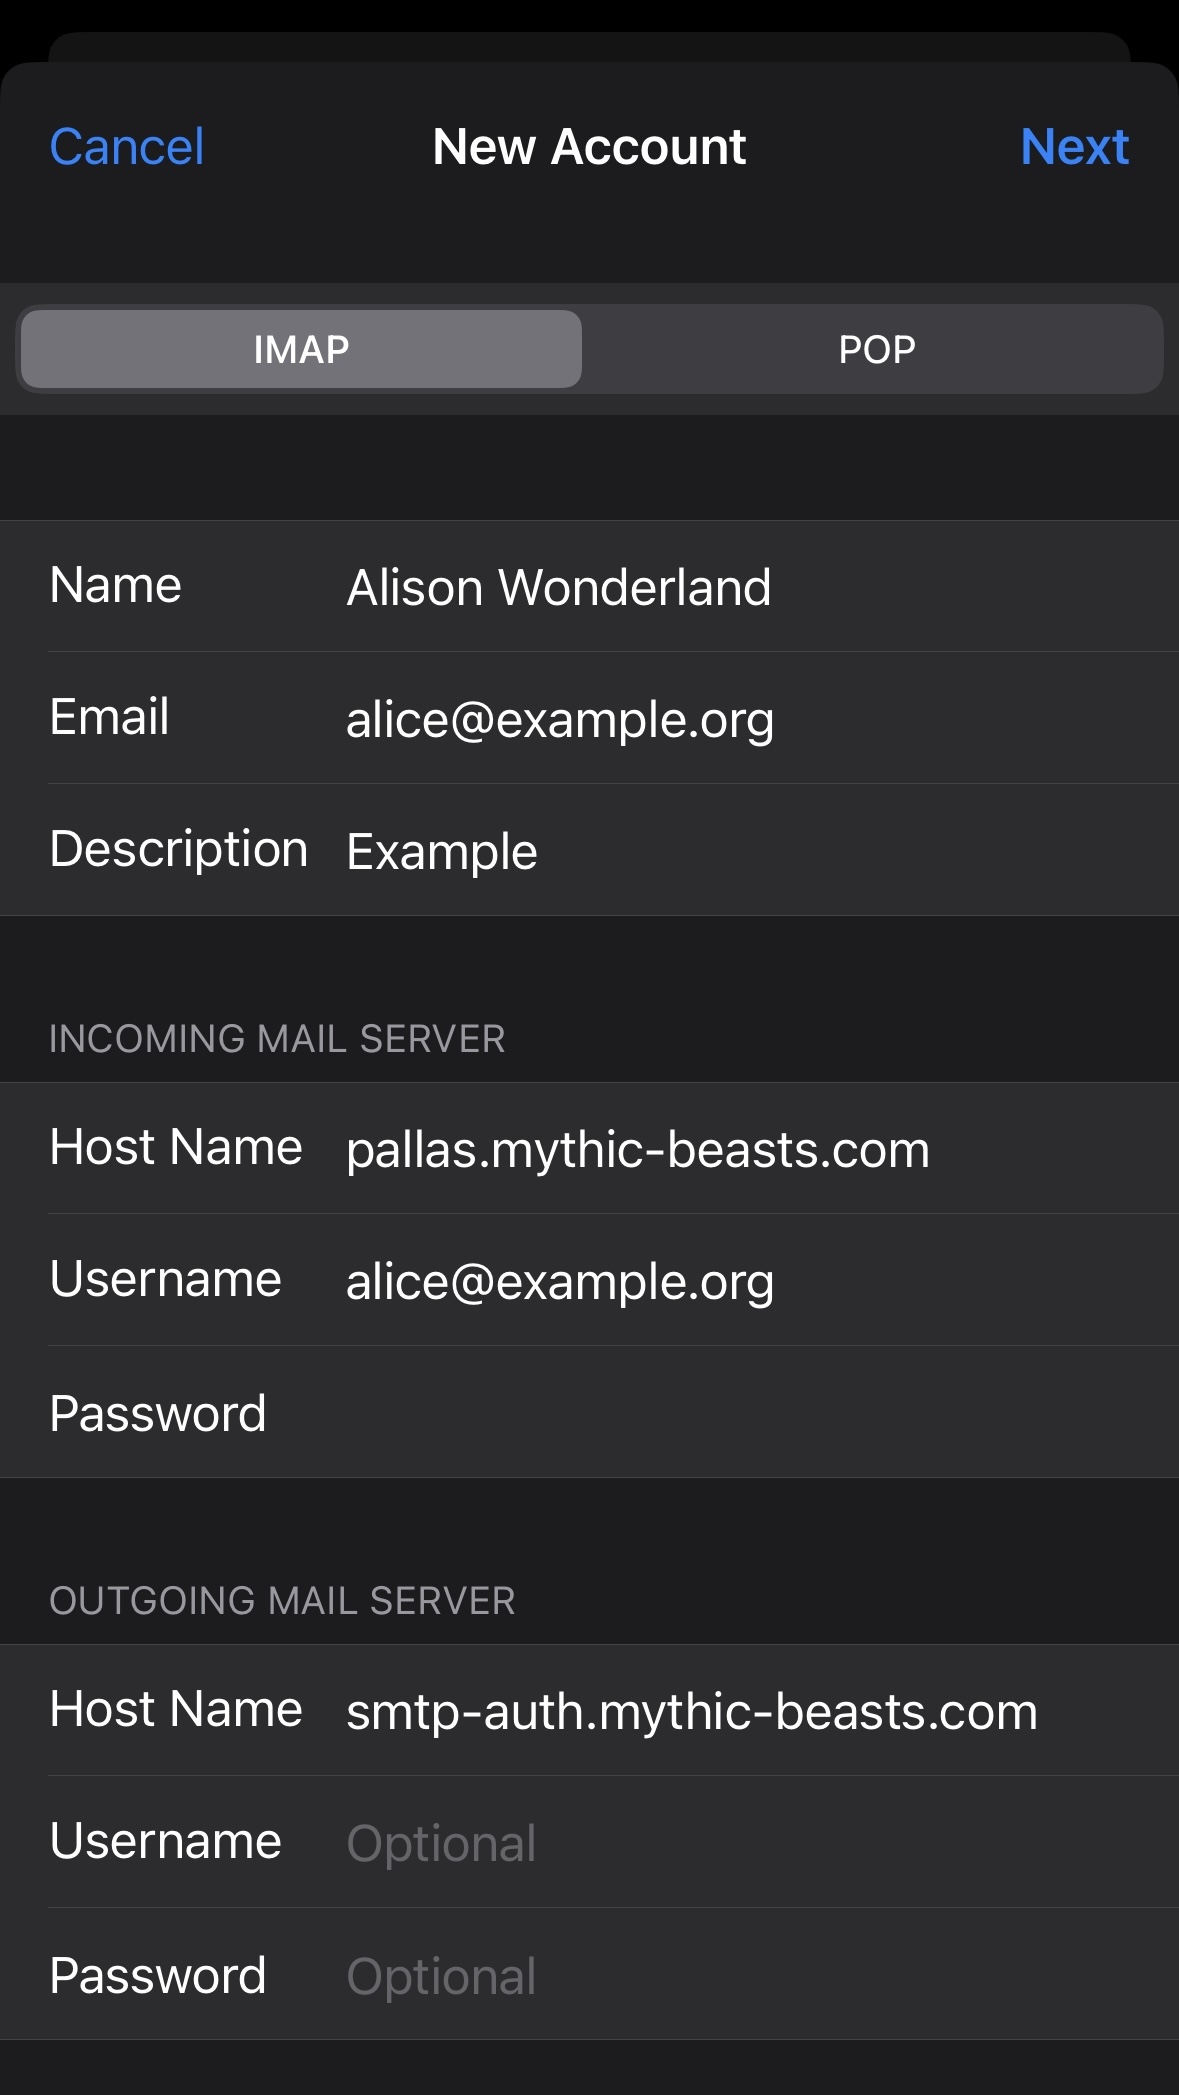 Once you've tapped next, it will show a page where you can enter the server details for your email. We recommend using IMAP as it works much better if you use your email on multiple devices.
First enter the details for the incoming server, these depend on the server that your account is hosted on. You can find this on the control panel. In this guide, we'll use pallas as an example. For the host name, put the name of the server, with .mythic-beasts.com at the end, so for pallas, you would put pallas.mythic-beasts.com. For the username and password, use the email address you typed in earlier, and put in the password for your email account.
The details for the outgoing server are the same no matter which server your account is on. The host name is smtp-auth.mythic-beasts.com. You don't need to type in the username and password again, because they'll carry over from the incoming server settings. Tap next. It will say "Verifying", then it may offer you the option of using notes as well as email with the account, you can do this if you want to. Press "Save". Your account has now been added and you will be able to see emails in the mail app.